

 1901 Sinks
 Abey
Abey
 ADP
ADP
 ART Australia
 Blanco
 Caroma
 Decina
 Fienza
 Forme
Forme
 Geberit
 Linkware
 Linsol
 Lockwood
 Martec
 Meir
Meir
 Mercator
 Nero Tapware
 Oliveri
 Parisi
 Phoenix
 Radiant Heating
 Remer
Remer
 Timberline
 Turner Hastings
 Zip Water
 Accessories
 Basins
 Baths
Baths
 Mirrors
 Showers
 Taps
Taps
 Toilets
 Wastes
 Assisted Living
 Heating & Ventilation
 Boiling / Chilled / Sparkling Taps
 Sinks
Sinks
 Sink Accessories
 Laundry Tubs
 Laundry Taps
 Ceiling Fans
 Lighting
 Cooktops
 Induction Cooktops
 Gas Cooktops
 Electric Cooktops
 Dryers
 Fridges
 Microwaves
 Ovens
Ovens
 Rangehoods
 Washing Machines
 Black
Black
 Brushed Brass
 Brushed Gold
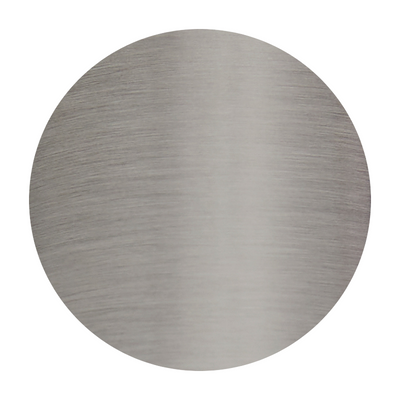 Brushed Nickel
 Champagne
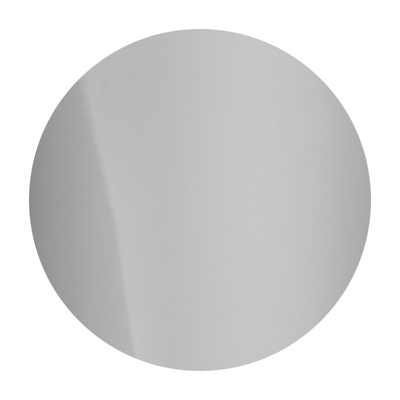 Chrome
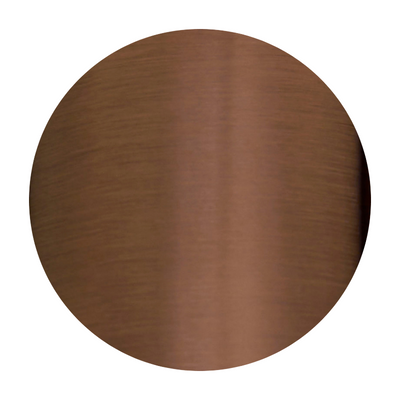 Copper
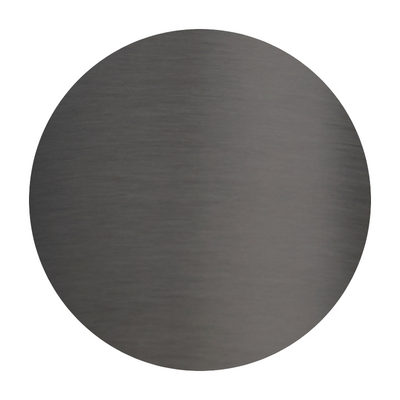 Gun Metal Grey
 Stainless Steel

How to Measure a Toilet Seat: Find the Right Fit
A replacement toilet seat can look perfect online and still overhang the bowl, leave a gap at the front or arrive with hinges you cannot fit. Before choosing a colour or soft-close upgrade, check the shape and measurements of the toilet pan underneath it.
This guide from Blue Leaf Bathware & Tiles explains how to measure a toilet seat for replacement in Australia, using millimetres and a simple compatibility checklist. You will learn which dimensions to record, how to compare product drawings and what to check before ordering.
How do you measure a toilet seat for replacement?
Measure the distance between the centres of the pan's fixing holes, the length from their centreline to the front edge, and the pan's widest outside width. Record all three in millimetres. Then match the pan shape, fixing method and replacement seat's technical drawing before buying.
This three-measurement approach is outlined in FIX-A-TAP's pan measurement guidance. Dimensions narrow your options; they do not replace checking the seat's intended fit.
Are toilet seat sizes standard in Australia?
There is no single replacement toilet seat size that fits every Australian toilet. Seats differ in outline, overall dimensions, hinge adjustment and mounting arrangement. A product described as “standard” or “universal” still has a defined fit range.
For example, FIX-A-LOO's Econix seat lists a 370 mm width and pan-hole spacing of 160–175 mm. Those figures describe that product, not a national standard for every toilet.
Use your actual pan as the starting point. Once you have its details, browse replacement toilet seats at Blue Leaf and compare the specifications of individual options.
If you are replacing the complete toilet, our Australian toilet dimensions guide covers the broader sizing questions. Here, the focus is the seat fitted to your existing pan.
Quick comparison: toilet seat shapes and fittings
Use these descriptions to organise your search. Shape names alone are not precise enough to confirm compatibility.
| Type | Identifying feature | Check before buying |
|---|---|---|
| Oval | Curved outline with an extended front. | Front curve, width and hinge-to-front fit. |
| D-shaped | Relatively straight rear and rounded front. | Rear profile and complete pan outline. |
| Square or soft-square | Squarer outline, sometimes with rounded corners. | Corner shape and model compatibility. |
| Top fixing | Fixings secured from above. | Specified anchors and pan-hole suitability. |
| Bottom fixing | Nuts secured beneath the mounting holes. | Access underneath for fitting and tightening. |
| Adjustable fit | Hinges offer a stated adjustment range. | Both spacing and length limits, plus shape. |
Before measuring: identify the pan and existing seat
Gather a tape measure with millimetre markings, your phone and a note for recording results. Take one photograph directly above the pan and another showing the hinges. An angled photograph can make the front look shorter or the sides more tapered.
Look for accessible brand names, model labels or codes. Keep the seat code separate from the toilet model if both are visible. The fitted seat may already be a replacement, so its shape is a reference rather than proof of the correct match.
Lift the lid and seat to see the ceramic outline. If the seat hides the fixing points, consult its removal instructions. Do not force unfamiliar release buttons or seized fittings simply to obtain a measurement.
Record uncertain readings as uncertain. A clear photograph showing the obstruction is more useful to a supplier than a confidently guessed dimension.
The three toilet seat measurements to record
1. Fixing-hole spacing
Measure centre to centre between the two mounting holes at the rear of the pan. Use the hole centres rather than the outside edges of hinge covers. Write this down as “fixing centres”.
2. Fixing centreline to front edge
Measure forwards from the line through the mounting-hole centres to the outside front edge of the ceramic pan. Record it as “fixing-to-front length” to distinguish it from the seat's overall length.
3. Maximum outside width
Measure across the widest outside part of the ceramic pan. Do not substitute the opening width or the lid width. Check the tape is level and read the measurement from above.
Keep all readings in millimetres. If you initially record centimetres, convert them before comparing: 16 cm is 160 mm, not 16 mm.
How to compare your measurements with a product drawing
A product listing may show overall length, overall width and an adjustable hinge range. These are different measurements. Compare the endpoints marked on the drawing with the endpoints you used on the pan.
In particular, an overall seat length can include material behind the hinge centreline. It should not automatically be compared with your fixing-to-front measurement. If the drawing does not identify that distance, ask for clarification.
A worked comparison example
Imagine your notes show 155 mm fixing centres, 440 mm fixing-to-front length and 365 mm outside width. These are illustrative measurements, not recommended Australian standard sizes.
A candidate listing gives a 140–170 mm fixing range. Your spacing is inside that range, so it passes the first check. However, if the only length shown is “460 mm overall”, you still cannot confirm its forward reach from that figure alone.
Next, obtain the relevant drawing, compare the outline and confirm the mounting arrangement. This sequence prevents one matching number from being mistaken for a complete fit.
For adjustable products, the manufacturer's stated limits are the boundaries to work within. Do not assume that more bolt movement is available than the specification allows.
Top fixing versus bottom fixing: why access matters
A bottom-fixing arrangement uses nuts underneath the pan's mounting holes. You need access below to secure them. A top-fixing arrangement is secured from above, which matters when the underside is inaccessible.
These differences are explained in FIX-A-TAP's seat comparison guide. When choosing a replacement, check whether the supplied kit supports top fixing, bottom fixing or both.
A photograph of the bolt cap does not tell you the complete mounting arrangement. Check the installation instructions and what is included in the box.
For example, Caroma lists blind fixing and adjustable pan fittings for its Caravelle seat, item 254003W. Those are product-specific features; they should not be assumed for every seat carrying the same brand.
Already identified a Caroma pan? Explore Caroma replacement seats with the model details and measurements beside you.
Can you upgrade to soft-close or quick-release?
Once compatibility is established, choose the features you want. Soft-close controls the lowering action. Quick-release allows the seat to detach using its designed release mechanism for easier cleaning. One feature does not automatically include the other.
Check the exact product variation before ordering. Similar-looking listings may have different hinges, materials or release systems. Keep the chosen item code with your measurements so enquiries refer to the same option.
If you are considering a bidet seat, treat that as a separate upgrade. Its fit and installation requirements need additional checks; our Australian bidet guide explains the available formats and planning considerations.
After fitting, follow the supplied care instructions. Caroma's cleaning guidance recommends a soft cloth and warm, soapy water for seats, with abrasive cleaners avoided.
Common mistakes that lead to the wrong replacement
- Measuring only the old lid: it may conceal the pan shape or belong to a poorly matched replacement.
- Using hinge-cover edges: decorative covers are not the mounting-hole centres.
- Confusing length definitions: overall length and fixing-to-front length may differ.
- Approving the seat on spacing alone: shape, width and fixing access still need checking.
- Relying on “universal”: look for the actual adjustment limits and suitability information.
- Choosing from one angled image: compare overhead views and technical drawings.
Before paying, read your notes against the selected variation once more. This is especially useful when several tabs contain near-identical white seats.
Your pre-order toilet seat checklist
Copy this list into a phone note and fill it in before contacting Blue Leaf or comparing products:
- Pan brand and model, if known.
- Existing seat code, if readable.
- Shape and a clear overhead photograph.
- Fixing centres: ___ mm.
- Fixing-to-front length: ___ mm.
- Maximum outside pan width: ___ mm.
- Access underneath the fixing holes: yes, no or uncertain.
- Proposed replacement name and item code.
- Required features: standard close, soft-close or quick-release.
Add the technical drawing or link you used for comparison. Ask the supplier to resolve any missing measurement before ordering, and check the applicable delivery and return conditions.
If you have two toilets, label each set of photographs and measurements separately. Similar bathrooms do not necessarily contain identical pans or seats.
Make the final comparison before you order
Create a shortlist of two or three seats only after recording your pan details. For each option, note the item code, drawing reference and any unanswered question. This keeps a sale price or attractive photograph from taking priority over compatibility.
Separate confirmed details from assumptions. You might know that the fixing range includes your measurement while still needing confirmation of the front profile. Mark that option as “needs checking”, rather than treating it as a match.
A useful enquiry could read: “My pan has 155 mm fixing centres, a 440 mm fixing-to-front measurement and a 365 mm maximum outside width. I have attached an overhead photograph and a hinge photograph. Does this item suit the pan, and are the required fixings included?” These figures are examples only; replace them with your own readings.
If the supplier requests another photograph, show the whole relevant area as well as a close-up. A close-up captures markings, while the wider view shows where that component sits. Include a ruler in the same plane when illustrating a dimension, without relying on a photograph as your only measurement.
When the order arrives, check its item code against your confirmation before installation. Follow the supplied fitting instructions, including any guidance about positioning and tightening. If the seat cannot align as specified, pause and ask for advice rather than forcing the hinges to compensate.
Finally, save the confirmed code and invoice with your bathroom records. If you later need a compatible hinge or another identical seat, you will have a much clearer starting point than a photograph alone.
Toilet seat measurement FAQs
Should I measure the toilet seat or the pan?
Use the pan for the core fitting measurements. The existing seat can supply useful model information, but it may not be the original or correctly matched seat.
Will any D-shaped seat fit a D-shaped toilet?
No. The description helps narrow the search, but the profile, dimensions and fixing arrangement must also match. Compare the actual drawing and model suitability.
What if I cannot see the fixing holes?
Check the existing seat's instructions for access or removal. Send photographs if the arrangement is unclear. Avoid substituting hinge-cover measurements without identifying the true centres.
Can adjustable hinges make a seat fit?
Only within the specified adjustment range and with an otherwise suitable seat. Hinge adjustment cannot turn a different outline into the correct pan shape.
What should I send if the model label is missing?
Send overhead and hinge photographs, the three measurements, and any surviving markings. Include the replacement you are considering so the supplier has a specific option to check.
Find a replacement toilet seat with Blue Leaf
A few clear measurements make shopping more straightforward. Keep your notes ready while exploring Blue Leaf Bathware & Tiles' toilet seat range, then compare the technical details of your preferred option.
Unsure about the fit? Email Blue Leaf your measurements and photographs and ask for help checking the proposed seat before ordering. Include the product code and any missing detail you need confirmed.
References and further guidance
A replacement toilet seat can look perfect online and still overhang the bowl, leave a gap at the front or arrive with hinges you cannot fit. Before choosing a colour or soft-close upgrade, check the shape and measurements of the toilet pan underneath it.
This guide from Blue Leaf Bathware & Tiles explains how to measure a toilet seat for replacement in Australia, using millimetres and a simple compatibility checklist. You will learn which dimensions to record, how to compare product drawings and what to check before ordering.
How do you measure a toilet seat for replacement?
Measure the distance between the centres of the pan's fixing holes, the length from their centreline to the front edge, and the pan's widest outside width. Record all three in millimetres. Then match the pan shape, fixing method and replacement seat's technical drawing before buying.
This three-measurement approach is outlined in FIX-A-TAP's pan measurement guidance. Dimensions narrow your options; they do not replace checking the seat's intended fit.
Are toilet seat sizes standard in Australia?
There is no single replacement toilet seat size that fits every Australian toilet. Seats differ in outline, overall dimensions, hinge adjustment and mounting arrangement. A product described as “standard” or “universal” still has a defined fit range.
For example, FIX-A-LOO's Econix seat lists a 370 mm width and pan-hole spacing of 160–175 mm. Those figures describe that product, not a national standard for every toilet.
Use your actual pan as the starting point. Once you have its details, browse replacement toilet seats at Blue Leaf and compare the specifications of individual options.
If you are replacing the complete toilet, our Australian toilet dimensions guide covers the broader sizing questions. Here, the focus is the seat fitted to your existing pan.
Quick comparison: toilet seat shapes and fittings
Use these descriptions to organise your search. Shape names alone are not precise enough to confirm compatibility.
| Type | Identifying feature | Check before buying |
|---|---|---|
| Oval | Curved outline with an extended front. | Front curve, width and hinge-to-front fit. |
| D-shaped | Relatively straight rear and rounded front. | Rear profile and complete pan outline. |
| Square or soft-square | Squarer outline, sometimes with rounded corners. | Corner shape and model compatibility. |
| Top fixing | Fixings secured from above. | Specified anchors and pan-hole suitability. |
| Bottom fixing | Nuts secured beneath the mounting holes. | Access underneath for fitting and tightening. |
| Adjustable fit | Hinges offer a stated adjustment range. | Both spacing and length limits, plus shape. |
Before measuring: identify the pan and existing seat
Gather a tape measure with millimetre markings, your phone and a note for recording results. Take one photograph directly above the pan and another showing the hinges. An angled photograph can make the front look shorter or the sides more tapered.
Look for accessible brand names, model labels or codes. Keep the seat code separate from the toilet model if both are visible. The fitted seat may already be a replacement, so its shape is a reference rather than proof of the correct match.
Lift the lid and seat to see the ceramic outline. If the seat hides the fixing points, consult its removal instructions. Do not force unfamiliar release buttons or seized fittings simply to obtain a measurement.
Record uncertain readings as uncertain. A clear photograph showing the obstruction is more useful to a supplier than a confidently guessed dimension.
The three toilet seat measurements to record
1. Fixing-hole spacing
Measure centre to centre between the two mounting holes at the rear of the pan. Use the hole centres rather than the outside edges of hinge covers. Write this down as “fixing centres”.
2. Fixing centreline to front edge
Measure forwards from the line through the mounting-hole centres to the outside front edge of the ceramic pan. Record it as “fixing-to-front length” to distinguish it from the seat's overall length.
3. Maximum outside width
Measure across the widest outside part of the ceramic pan. Do not substitute the opening width or the lid width. Check the tape is level and read the measurement from above.
Keep all readings in millimetres. If you initially record centimetres, convert them before comparing: 16 cm is 160 mm, not 16 mm.
How to compare your measurements with a product drawing
A product listing may show overall length, overall width and an adjustable hinge range. These are different measurements. Compare the endpoints marked on the drawing with the endpoints you used on the pan.
In particular, an overall seat length can include material behind the hinge centreline. It should not automatically be compared with your fixing-to-front measurement. If the drawing does not identify that distance, ask for clarification.
A worked comparison example
Imagine your notes show 155 mm fixing centres, 440 mm fixing-to-front length and 365 mm outside width. These are illustrative measurements, not recommended Australian standard sizes.
A candidate listing gives a 140–170 mm fixing range. Your spacing is inside that range, so it passes the first check. However, if the only length shown is “460 mm overall”, you still cannot confirm its forward reach from that figure alone.
Next, obtain the relevant drawing, compare the outline and confirm the mounting arrangement. This sequence prevents one matching number from being mistaken for a complete fit.
For adjustable products, the manufacturer's stated limits are the boundaries to work within. Do not assume that more bolt movement is available than the specification allows.
Top fixing versus bottom fixing: why access matters
A bottom-fixing arrangement uses nuts underneath the pan's mounting holes. You need access below to secure them. A top-fixing arrangement is secured from above, which matters when the underside is inaccessible.
These differences are explained in FIX-A-TAP's seat comparison guide. When choosing a replacement, check whether the supplied kit supports top fixing, bottom fixing or both.
A photograph of the bolt cap does not tell you the complete mounting arrangement. Check the installation instructions and what is included in the box.
For example, Caroma lists blind fixing and adjustable pan fittings for its Caravelle seat, item 254003W. Those are product-specific features; they should not be assumed for every seat carrying the same brand.
Already identified a Caroma pan? Explore Caroma replacement seats with the model details and measurements beside you.
Can you upgrade to soft-close or quick-release?
Once compatibility is established, choose the features you want. Soft-close controls the lowering action. Quick-release allows the seat to detach using its designed release mechanism for easier cleaning. One feature does not automatically include the other.
Check the exact product variation before ordering. Similar-looking listings may have different hinges, materials or release systems. Keep the chosen item code with your measurements so enquiries refer to the same option.
If you are considering a bidet seat, treat that as a separate upgrade. Its fit and installation requirements need additional checks; our Australian bidet guide explains the available formats and planning considerations.
After fitting, follow the supplied care instructions. Caroma's cleaning guidance recommends a soft cloth and warm, soapy water for seats, with abrasive cleaners avoided.
Common mistakes that lead to the wrong replacement
- Measuring only the old lid: it may conceal the pan shape or belong to a poorly matched replacement.
- Using hinge-cover edges: decorative covers are not the mounting-hole centres.
- Confusing length definitions: overall length and fixing-to-front length may differ.
- Approving the seat on spacing alone: shape, width and fixing access still need checking.
- Relying on “universal”: look for the actual adjustment limits and suitability information.
- Choosing from one angled image: compare overhead views and technical drawings.
Before paying, read your notes against the selected variation once more. This is especially useful when several tabs contain near-identical white seats.
Your pre-order toilet seat checklist
Copy this list into a phone note and fill it in before contacting Blue Leaf or comparing products:
- Pan brand and model, if known.
- Existing seat code, if readable.
- Shape and a clear overhead photograph.
- Fixing centres: ___ mm.
- Fixing-to-front length: ___ mm.
- Maximum outside pan width: ___ mm.
- Access underneath the fixing holes: yes, no or uncertain.
- Proposed replacement name and item code.
- Required features: standard close, soft-close or quick-release.
Add the technical drawing or link you used for comparison. Ask the supplier to resolve any missing measurement before ordering, and check the applicable delivery and return conditions.
If you have two toilets, label each set of photographs and measurements separately. Similar bathrooms do not necessarily contain identical pans or seats.
Make the final comparison before you order
Create a shortlist of two or three seats only after recording your pan details. For each option, note the item code, drawing reference and any unanswered question. This keeps a sale price or attractive photograph from taking priority over compatibility.
Separate confirmed details from assumptions. You might know that the fixing range includes your measurement while still needing confirmation of the front profile. Mark that option as “needs checking”, rather than treating it as a match.
A useful enquiry could read: “My pan has 155 mm fixing centres, a 440 mm fixing-to-front measurement and a 365 mm maximum outside width. I have attached an overhead photograph and a hinge photograph. Does this item suit the pan, and are the required fixings included?” These figures are examples only; replace them with your own readings.
If the supplier requests another photograph, show the whole relevant area as well as a close-up. A close-up captures markings, while the wider view shows where that component sits. Include a ruler in the same plane when illustrating a dimension, without relying on a photograph as your only measurement.
When the order arrives, check its item code against your confirmation before installation. Follow the supplied fitting instructions, including any guidance about positioning and tightening. If the seat cannot align as specified, pause and ask for advice rather than forcing the hinges to compensate.
Finally, save the confirmed code and invoice with your bathroom records. If you later need a compatible hinge or another identical seat, you will have a much clearer starting point than a photograph alone.
Toilet seat measurement FAQs
Should I measure the toilet seat or the pan?
Use the pan for the core fitting measurements. The existing seat can supply useful model information, but it may not be the original or correctly matched seat.
Will any D-shaped seat fit a D-shaped toilet?
No. The description helps narrow the search, but the profile, dimensions and fixing arrangement must also match. Compare the actual drawing and model suitability.
What if I cannot see the fixing holes?
Check the existing seat's instructions for access or removal. Send photographs if the arrangement is unclear. Avoid substituting hinge-cover measurements without identifying the true centres.
Can adjustable hinges make a seat fit?
Only within the specified adjustment range and with an otherwise suitable seat. Hinge adjustment cannot turn a different outline into the correct pan shape.
What should I send if the model label is missing?
Send overhead and hinge photographs, the three measurements, and any surviving markings. Include the replacement you are considering so the supplier has a specific option to check.
Find a replacement toilet seat with Blue Leaf
A few clear measurements make shopping more straightforward. Keep your notes ready while exploring Blue Leaf Bathware & Tiles' toilet seat range, then compare the technical details of your preferred option.
Unsure about the fit? Email Blue Leaf your measurements and photographs and ask for help checking the proposed seat before ordering. Include the product code and any missing detail you need confirmed.